Secure Remote Development with zrok and JetBrains


If you can secure your remote work, you, too, can work anywhere.
I love working remotely, and sometimes, ‘remote’ is truly out there. I’ve worked from faraway islands and foreign countries to your local coffee shop and campground. Regardless of where I’m at, I need one thing in particular: a secure connection to my workstation and development environment at home.
Getting connected is easy. There’s open internet access just about everywhere I go, and when there’s not, I can point a Starlink terminal towards the sky. The less obvious but tremendously important part is securing that connection. Can you imagine the personal and professional harm it would cause if I took this work-from-anywhere privilege for granted and I was the engineer whose access was used to compromise my employer or our clients? That’s nightmare fuel.
Fortunately, a set of easy-to-use tools allows me to gallivant around the world and remain confident in my connection and its security. Namely, zrok.io and JetBrains remote development.
I combine these tools to ensure I can always connect securely from my laptop to my development workstation at home without an open port on my home network, a static IP, or a domain name to call back to. My home network does not listen for connections from the Internet and is dark.
zrok.io makes that possible by dialing out from my workstation and registering a “private share” on a hidden zero-trust network overlay. That may sound like word salad, but the gist is this: There is a software-level network out there that you can’t talk to unless you authenticate first. Without the correct certificate, it simply ignores your TCP packets. My home workstation and laptop are pre-authenticated with certificates allowing them to talk to each other over this hidden zero-trust network (which, BTW, also applies end-to-end encryption.) If you’re curious to learn more, I encourage you to contact the OpenZiti team that created the network or NetFoundry.io for B2B inquiries.
If, on the other hand, you just want to secure your remote development before your next adventure, I have you covered. Here are three easy steps to do it.
Step 1 - zrok Install & Setup
Install the zrok command onto each device that you want to be able to connect to or from.
There are installers for Windows, Linux, and Mac, and they all result in a single new command: zrok
Get invited to the hidden network. It may sound glamorous, but it’s actually easy. From any one of your devices, run: zrok invite
It will ask you to enter your email address, and then you will receive an email to activate your account. Click the link in the email, set a password, and you are now logged into the zrok web portal, from which you can control your private corner of the hidden zero-trust network overlay.
Register your devices. Remember how I said my home workstation and laptop were pre-authenticated with certificates to talk to the hidden zero-trust network? This is how that happens, and it’s dead simple.
Select “Enable Your Environment” from your account menu (click your email address) on the zrok web portal. The portal will display a zrok command like zrok enable l2Ndsa92r7j3, which you must copy and run on one of your devices. Repeat this process of generating and running the command for each device you intend to use.
Step 2 - Sharing is Caring
Now that your devices are registered, you must create a “share” on the device hosting your project files. Execute the following in a terminal on that device:
zrok reserve private --backend-mode tcpTunnel 127.0.0.1:22
This tells zrok that you intend to expose a TCP tunnel to local port 22, which you may recognize as the common ssh port and is what JetBrains uses for remote development.
The reserve command will output a “share token”, like this: your reserved share token is '5adagwfl888k'. Write this token value down. You will use it whenever you need to start, stop, or connect to this share.
Next, start the share on the device hosting your project files with the following command:
zrok share reserved 5adagwfl888k(replace5adagwfl888kwith your token)
This starts the share as a foreground process. You can stop it by pressing ctrl-c, and restart it by running the command again. It's ephemeral; easy to create, destroy, and repeat.
On your roaming device, where you intend to run your IDE front-end, run the zrok access command with your share token:
zrok access private 5adagwfl888k(replace5adagwfl888kwith your token)
Just like the sharing (hosting) side, this creates a foreground process that you can ctrl-c to stop and which can be rerun at will to reconnect.
Both the share and access side display information about the connection, including connection setup details in case you’ve forgotten the commands. On your roaming device where the zrok access command is running, it will print a local url where the tunnel is listening, like: tcp://127.0.0.1:9191 -> 5adagwfl888k We'll use that in our JetBrains IDE during the next and final step.
Step 3 - JetBrains Remote Development
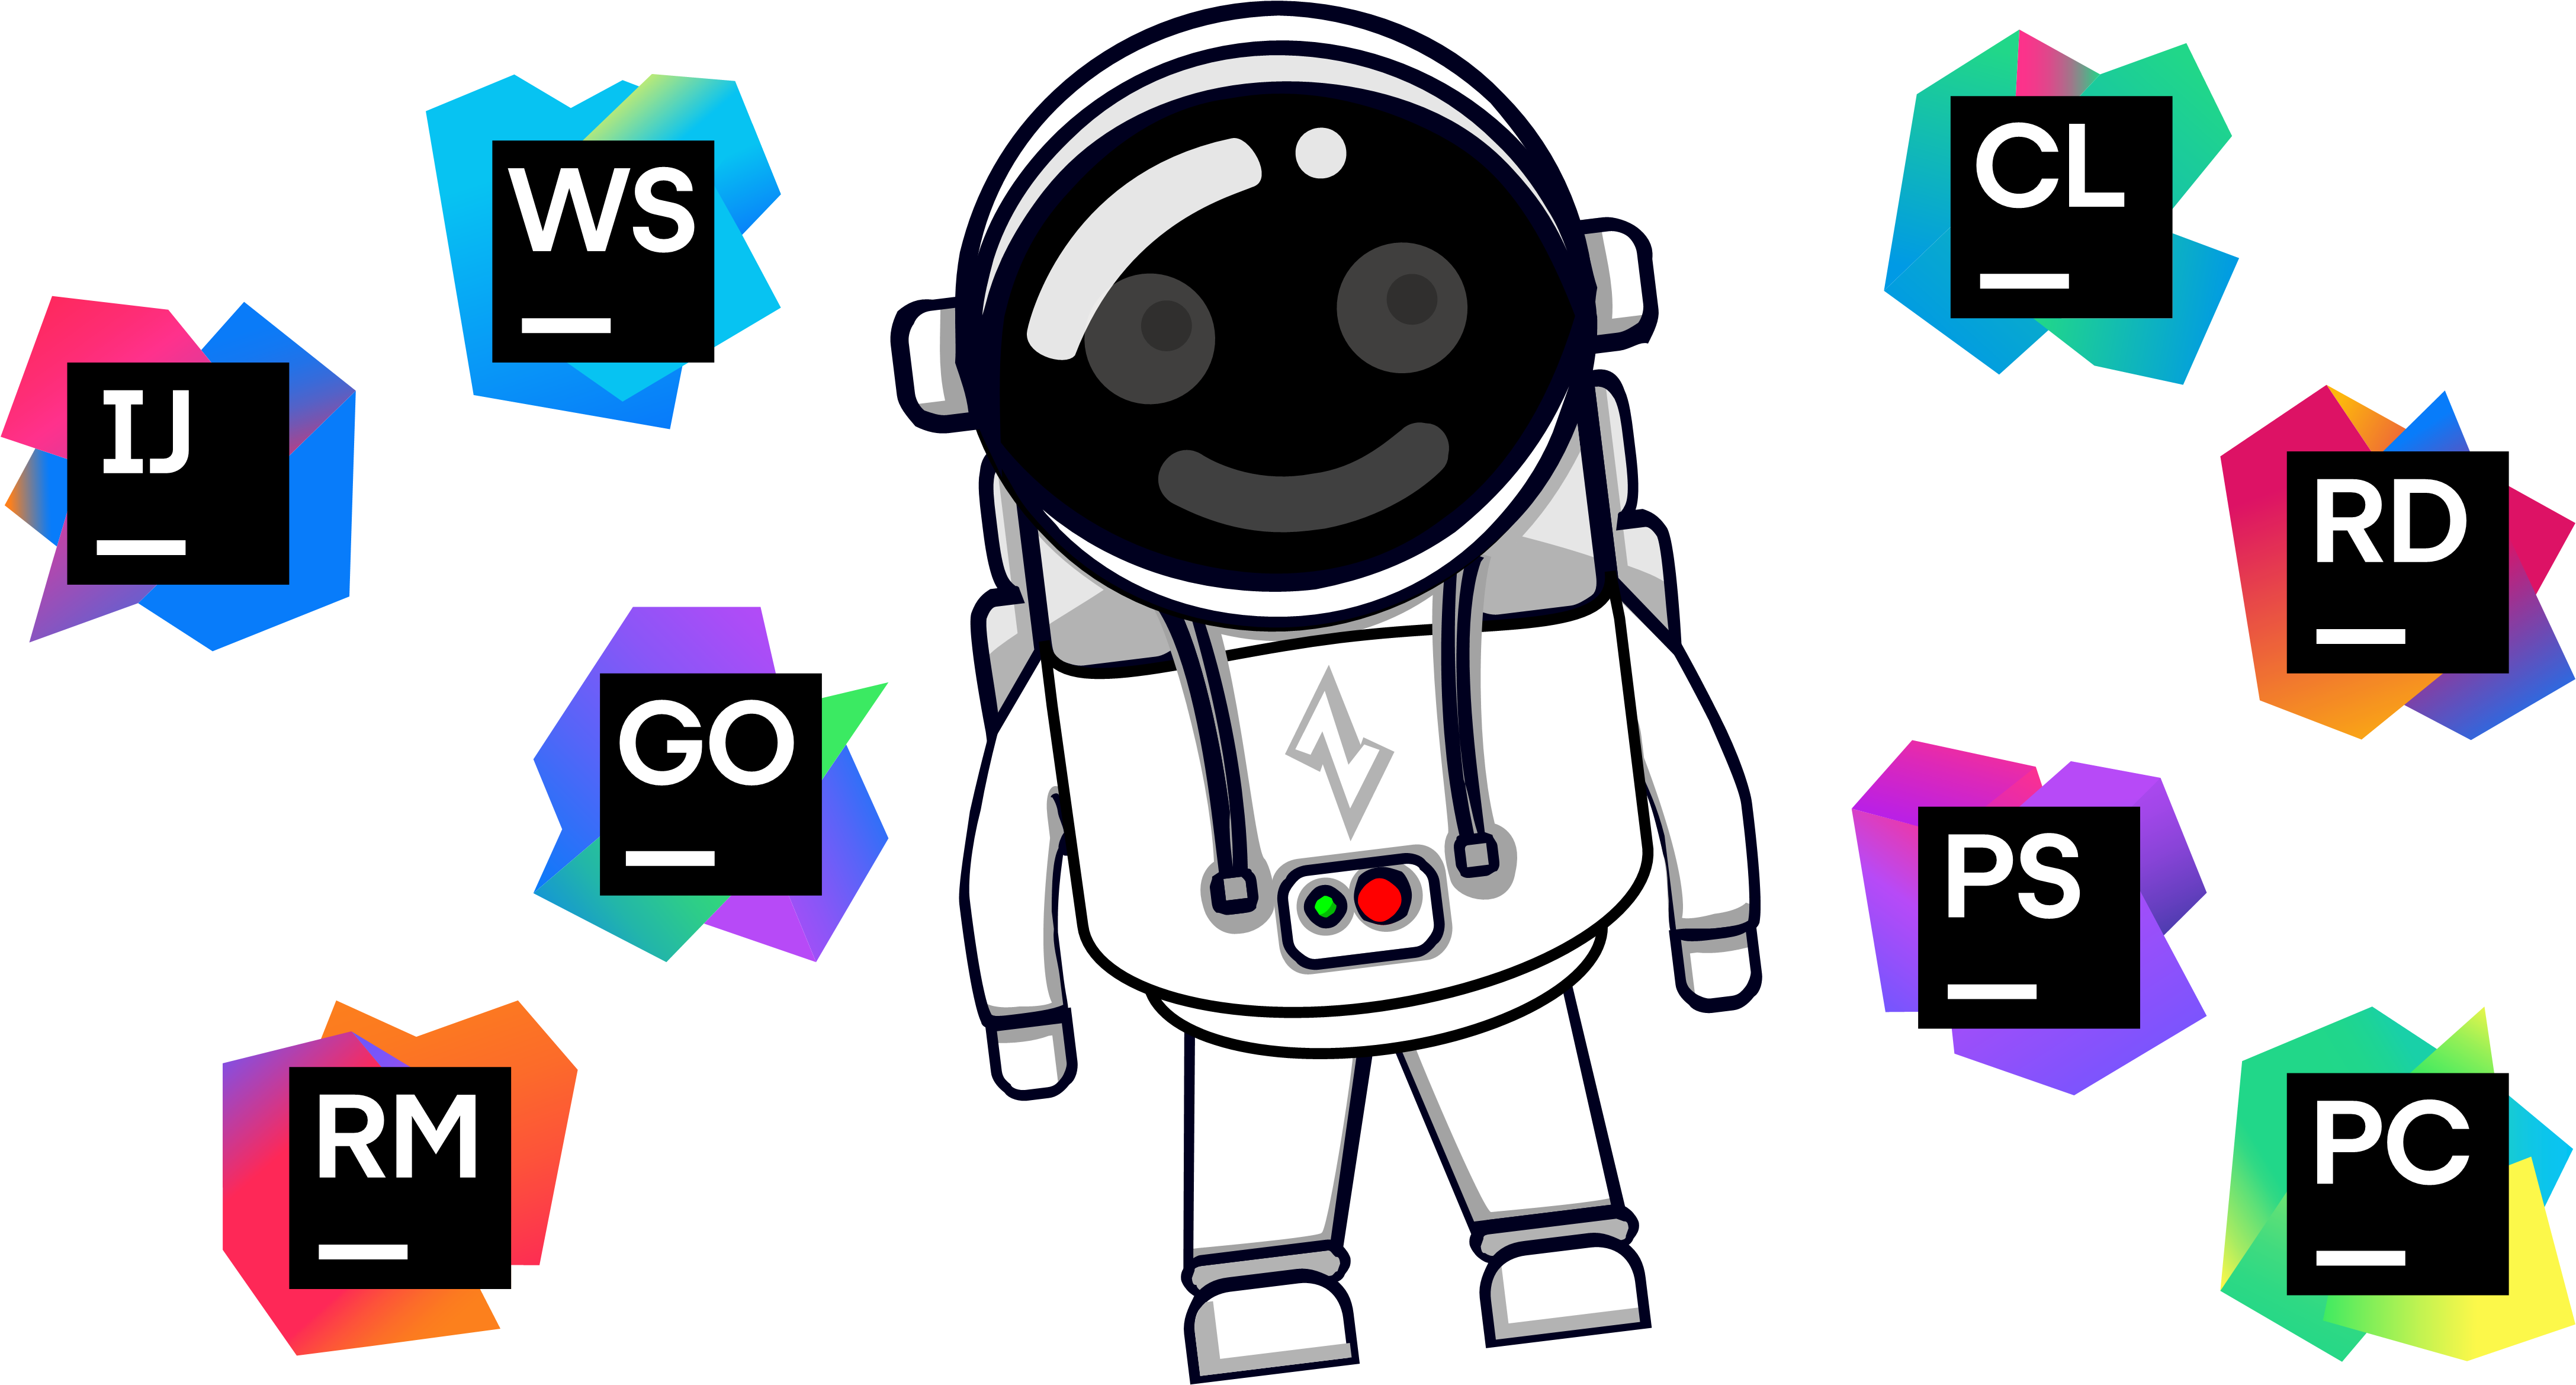
JetBrains support for remote development is one of those features that you don’t realize how much you need until you start using it. And to JetBrains’ credit, it is intuitive and easy to set up no matter how you plan to structure it. Take my advice and just try it first; don’t worry about which software runs where, if you need a JetBrains gateway, or anything else. Just start this way, and you can adjust from there.
The following assumes your project files are on the “hosting” device and that you want to run your JetBrains IDE as a front-end on your “remote” device. I’ll also assume you have installed a copy of your JetBrains IDE on both devices.
Start your IDE on the remote device. If it opens straight into an existing local project, that’s okay; select Remote Development from the File menu. Either way, you should see a dialog similar to these:
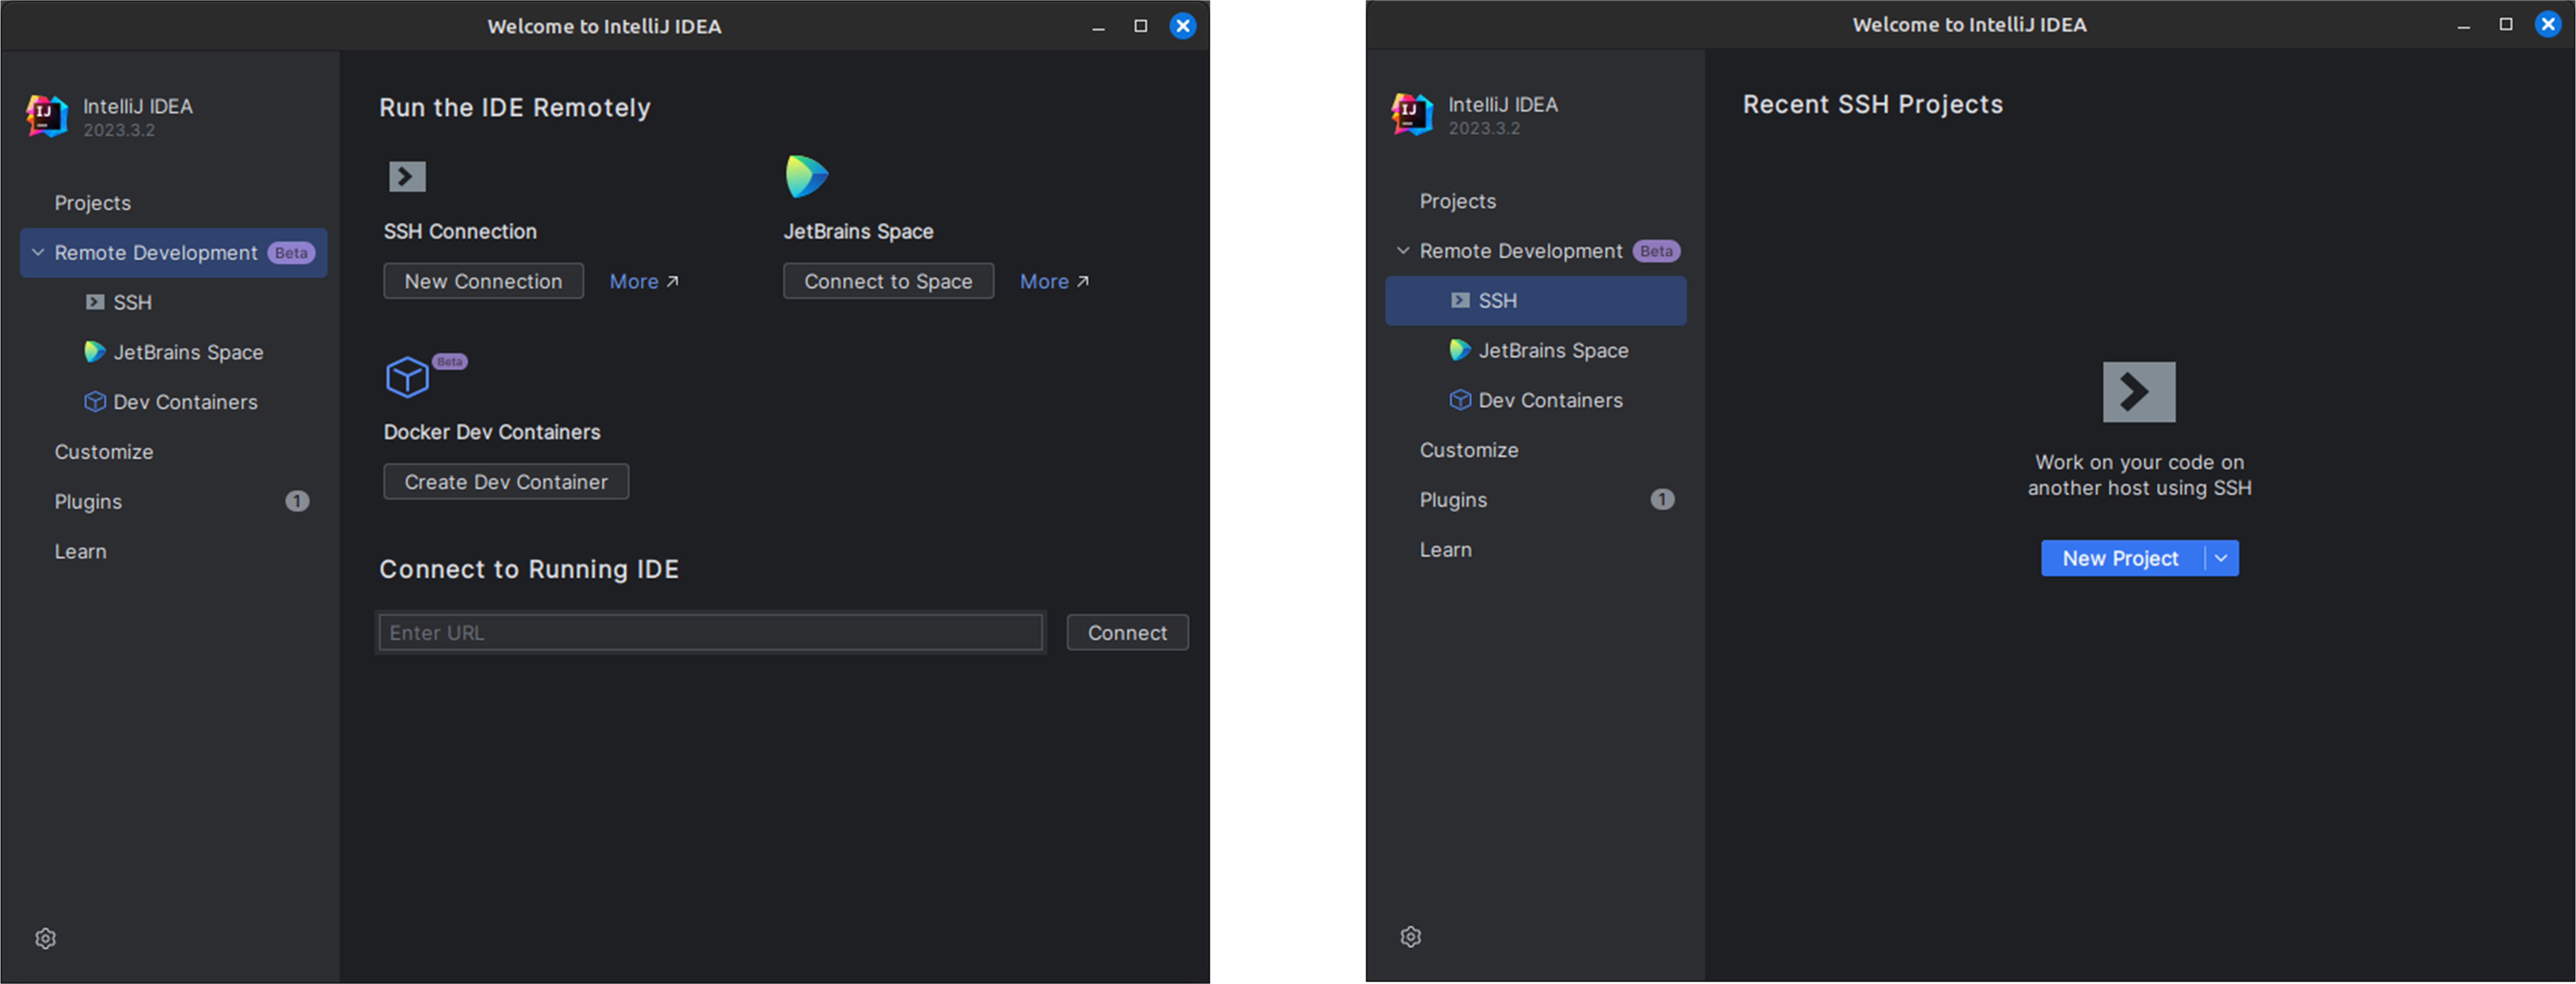
Under SSH, click to create a new connection or a new project. You will be prompted for a username, host, and port.
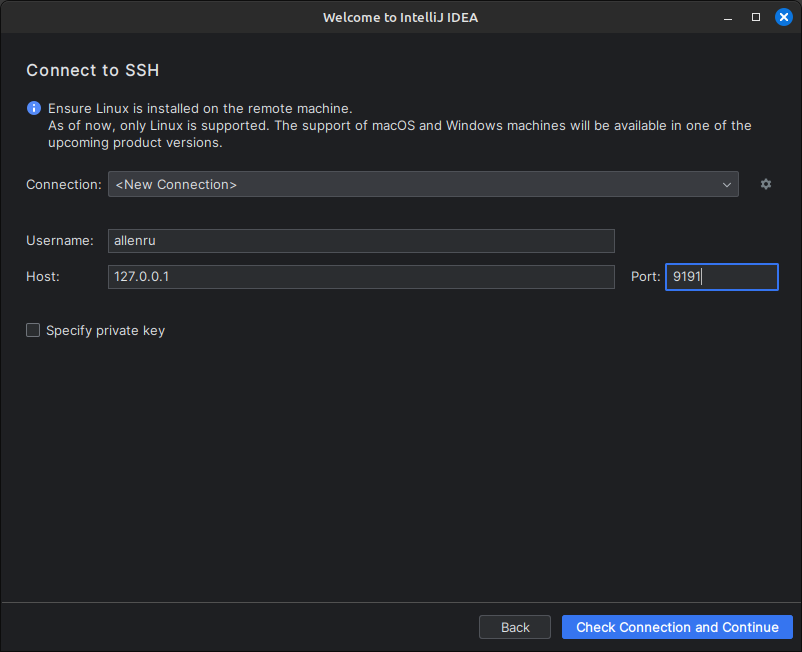
For the host IP and Port, enter the values from the local zrok access, which is shown at the top of the terminal window while it is running. In my case, that URL is shown as tcp://127.0.0.1:9191, so I've entered the Host as 127.0.0.1 and the Port as 9191. This tells JetBrains to talk to the local zrok tunnel as if it were the remote SSH host.
Click “Check Connection and Continue” and after a minute of setup, you’ll be prompted to select a project to open.
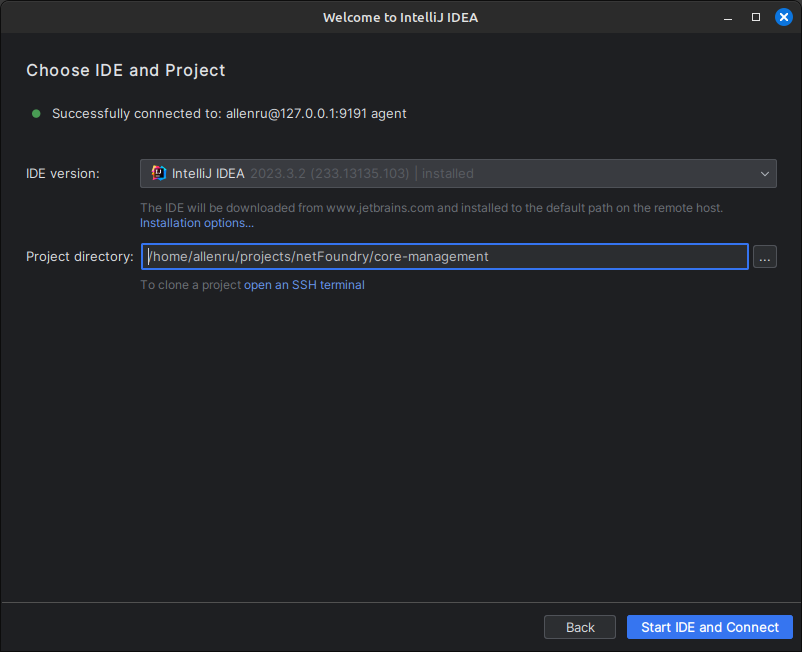
The project directory you choose from is on the remote hosting device where, as the name implies, you are hosting your project files. Select the root directory of an existing project and click the Start IDE and Connect button.
And BAM! You are now in your familiar IDE in the project you love to work on, yet all the working files remain on the remote workstation. Edits, building, and running all happen on the remote workstation. You can even open a shell on the remote workstation with a click of a button.
When you start your IDE in the future, JetBrains will remember and offer all the remote projects you’ve connected to in the past, saving you from repeating the connection setup.
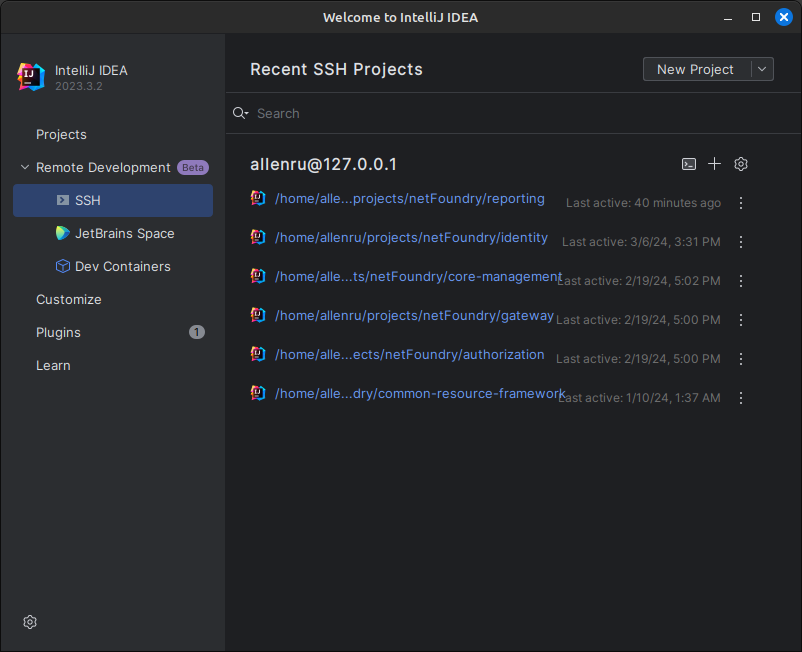
A single click on the project launches the IDE for that project. Clicking the terminal icon at the top right opens a terminal on the remote machine. Clicking the + icon allows you to add new projects to the remote host from this device.
JetBrains has made it easy to work on projects remotely, whether because of project size, securing the source, or any number of other reasons. With remote development, it's possible to separate the IDE front-end from the back-end that manages project files, builds, commits, etc.
zrok has made it easy to extend that remote link wherever needed and, critically, to do so securely. My employer, like most, dictates how I obtain and maintain secure access to code and services. However, if I extend that access so that I can work from anywhere, I become responsible for securing that extension. zrok solves that by providing a transient, encrypted, zero-trust tunnel that I can spin up and tear down in seconds.
I've skimmed over a lot of technical details in this blog, instead focusing on how easy (and important) it is to secure a JetBrains remote development connection using zrok. However, if you're more than just a casual user and want to understand how and why this works, I invite you to explore the underlying technologies by following the links below.
zrok is an open-source sharing solution, and zrok.io is a managed cloud instance with a free tier ideally suited for this personal remote development use case.
zrok.io manages an open-source zero-trust network built on OpenZiti. An OpenZiti network requires authentication before connection, and it extends the secure edge into the software, into the zrok command running on your devices. These are tenants of zero-trust networking, a network security best practice mandated by the US government.
All of this goodness is brought to us by NetFoundry, of whom I am a zitizen. I help build NetFoundry's managed network platform so that other businesses can enjoy all the benefits of a secure software-defined zero-trust network without the hassle of managing it.
I speak for all of us when I say, please contact us if you have questions. And if you want to say how cool this stuff is, please smash that like button, or is it a star? Ok, I admit it, I'm new to social media. But I know it means a lot to the team to hear and see your support. A star on the zrok repo is especially appreciated.