OpenZiti BrowZer Gateway
How to Acquire Wildcard TLS Certificates from a Public CA

Introduction
Welcome back to the next article concerning BrowZer, a new group of open-source components from the OpenZiti project that enables automatic embedding of zero trust networking into web applications. The reason BrowZer exists, and the problem it aims to solve is preventing your internet-facing web applications from being attacked by malicious threat actors.
This article is part of the ongoing web application security series concerning BrowZer, and here I will provide instructions concerning how to acquire TLS certificates for its gateway component — or what we internally refer to as the HTTP Agent.
Before proceeding below, you may be interested in reading the architectural overview of the OpenZiti BrowZer Gateway to get some broader context if you haven't already read it.

BrowZer Gateway Internet-Facing TLS
Customers of our CloudZiti offering will have everything described below automatically orchestrated for them. However, if you are a user of our OpenZiti open source offerings, then continue reading, and I'll provide information regarding the BrowZer Gateway TLS requirements and how to satisfy them.
The educational material contained in this article will certainly help enable you to deploy your own instance of the BrowZer Gateway, but please note that it is not exhaustive. Here we limit discussion to tooling you can use to acquire the necessary TLS certs you need to use with the BrowZer Gateway.
Additional articles in the series will be published soon and they will close the remaining gaps and describe all the IdP integration/configuration details, the BrowZer Gateway Docker container, and all BrowZer Gateway configuration details related to the OpenZiti overlay network it will be a part of.
HTTPS
For general web-related usability and security reasons, as well as BrowZer architectural reasons, the BrowZer Gateway must be served over HTTPS.
Not using HTTPS causes nasty things to happen:
browsers render scary warnings to users
users are exposed to security issues (e.g man-in-the-middle attacks).
As discussed earlier in the architectural overview of the OpenZiti BrowZer Gateway, in a BrowZer environment your web app will be invisible to the internet, and the BrowZer Gateway is deployed such that it is the web server that your users will point their browsers to in order to reach your dark web app.
Self-signed Cert? That's a No-No!
Using HTTPS implies using a TLS certificate. And while using TLS certificates with the BrowZer Gateway is certainly a requirement, using just any TLS certificate isn't good enough.
For example, you might be thinking: "I'll just run a command similar to the following...
openssl req -new -x509 -sha256 -newkey rsa:2048 \
  -nodes -keyout example-com.key.pem -days 365 \
  -out example-com.cert.pem
... to generate a self-signed cert, and I'll use that."
The problem with using a self-signed cert to host the BrowZer Gateway is that doing so will result in the client-side browser rendering something resembling the following when it visits a web server that uses a self-signed cert:
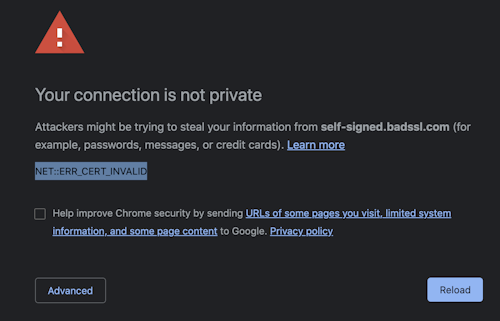
That's an obvious show-stopper.
The solution is to acquire a TLS certificate from a public certificate authority (CA) because certificates generated by public CA's will be trusted by browsers.
TLS Cert From a Public CA
It's possible to pay money to a company like AWS, Godaddy, Namecheap, etc., in order to get a certificate from a well-known public certificate authority..., but don't worry...
You don't need to spend any money to get the certificates you need!
Let’s Encrypt is an organization that issues TLS certificates for free to the public. Let’s Encrypt is reputable, and trusted by browsers. They were created by the Internet Security Research Group (with members like Chrome, Mozilla, Cisco, the Bill and Melinda Gates Foundation, etc.) and aim to facilitate an Internet where all websites communicate over HTTPS even if the site’s owner does not have money to buy TLS certificates on a recurring basis.
Broadly speaking, you can use Let’s Encrypt to generate certificates in multiple ways:
Using the automated system that your hosting company provides
Generating a certificate by manually interacting with Let’s Encrypt with scripts you run
Configuring your DNS zone and running a lightweight DNS-challenge name server to automatically use Let’s Encrypt to generate wildcard certificates
No discussion of item #1 (hosting providers) will be covered here since self-hosting a BrowZer environment is what we're focused on here.
If you wish to serve a single dark web app via the BrowZer gateway, item #2 (Manual Cert Generation) will suffice. I describe how to do that in Part-2 of this article.
If you wish to serve multiple dark web apps via a single BrowZer gateway, item #3 (Automatic Wildcard Cert Generation) is the recipe you'll need, since wildcard certs are a key underpinning of how the BrowZer Gateway facilitates hosting multiple dark web apps.
The remainder of this article (Part-1) will describe how you can easily obtain free wildcard certs for use with the BrowZer Gateway.
Automatic Wildcard Cert Generation
Wildcard certificates are in many cases more convenient and useful than their fully-qualified counterparts.
Sadly, wildcard certificates are not used in practice as often as they probably should. On the internet today it is not uncommon to see certificates with multiple Subject Alternate Names (SAN) for multiple subdomains. This can become problematic and even weaken infrastructure.
Wildcard certs are a key underpinning of how the BrowZer Gateway facilitates hosting multiple dark web apps. But note that you can still use the recipe described in this article to obtain a wildcard cert, and use that to protect a single dark web app.
Prove that you own the domain:
When you get a TLS certificate from Let’s Encrypt, their servers validate that you control the domain names for the certificate you are requesting. You need to prove to Let’s Encrypt that you own the domain.
To do this, you need to solve a "challenge", as defined by the ACME standard. That is, you need to do something that you would not be able to do if you didn’t own the domain and have admin access to it.
You can accomplish this in multiple ways: with a HTTP-01 challenge or a DNS-01 challenge.
We will use the DNS-01 technique, and you will need to add a certain DNS record to your domain (i.e. the DNS challenge).
The benefits/drawbacks of DNS-01 can be summarized as:
Pros:
can issue certificates containing wildcard domain names.
works well even if you have multiple web servers.
Cons:
keeping DNS API credentials on your web server is risky.
your DNS provider might not offer an API.
your DNS API may not provide information on propagation times.
Now, what if we could keep all the above pros, and eliminate all the cons? I'm an open-source enthusiast, so I looked around to see if there were any solutions to this question...
Good news!
I located a new project called Agnos. It is a good fit to acquire our wildcard certs without making us suffer the downsides mentioned above.
Agnos is a single-binary program allowing you to easily acquire wildcard certificates from Let's Encrypt using DNS-01 challenges. It answers Let's Encrypt DNS queries on its own, bypassing the need for API calls to your DNS provider.
By serving its own DNS answers, Agnos eliminates the need for DNS API usage and API credentials management. It also nullifies all concerns regarding propagation times. Hence, Agnos removes virtually all downsides of DNS-01 challenges.
Install Agnos
Port 53
These instructions are for a Linux system. Here I will use a Debian instance running in AWS.
Since Agnos will act as a DNS name server, your instance's inbound security group rules should include UDP port 53 (the port used for DNS) being open:

Stop dnsmasq
My Debian instance booted up with dnsmasq running and listening on port 53. Since we need Agnos to listen on port 53, we need to stop dnsmasq, like this:
sudo killall dnsmasq
Get the Agnose binary
Download Agnose from GitHub, like this:
wget https://github.com/krtab/agnos/releases/download/v.0.1.0-beta.1/agnos_amd64
Because Agnos will listen on the low-numbered port 53, it requires special privileges. Running it as root will do, but if you (understandably) don't want to do that, the following command is for you:
setcap 'cap_net_bind_service=+ep' agnos
Let's Encrypt account
Let's Encrypt accounts are identified by a private RSA key. To generate such a key use the following command:
openssl genrsa 4096 > /path/to/store/the/key.pem
Agnos configuration
Agnos is configured via a single TOML file. Here is a sample you can use (you'll just need to set your appropriate values for email, domains, and the various file paths.
# Address for Agnos to listen on.
dns_listen_adr = "0.0.0.0:53"

# Your LE account
[[accounts]]
email= "you@example.com"
private_key_path = "/path/to/store/the/key.pem"

# A certificate ordered for your account.
[[accounts.certificates]]
domains =  ["*.example.com"]
fullchain_output_file = "/path/to/store/the/fullchain.pem"
key_output_file = "/path/to/store/the/cert_key.pem"
Configuration of your DNS provider
I will use AWS Route53 as the DNS provider for this example (but you can use whatever DNS provider you want).
I have the ability to administer the .ziti.netfoundry.io domain, so I will be generating a wildcard cert for *.ziti.netfoundry.io for this example.
The Let's Encrypt DNS-01 challenge is going to ask for TXT DNS records on the following domain: _acme-challenge.ziti.netfoundry.io.
The Debian instance where my Agnos will be running has a public-facing IP address of 100.27.19.63.
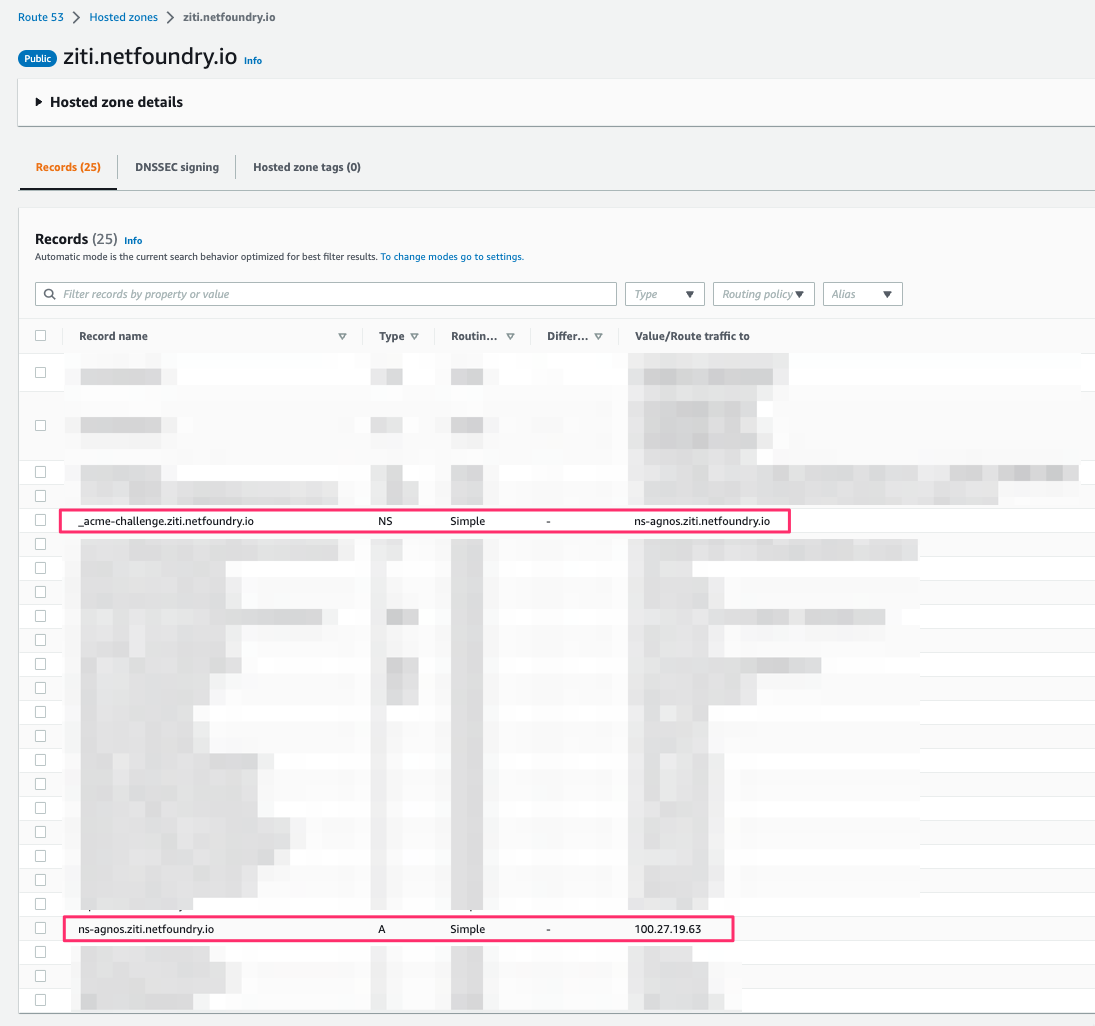
Our goal is to indicate that the _acme_challenge domain cited above is managed by Agnos using NS DNS records. NS records usually point to domain names, so we will also set an A record on ns-agnos.ziti.netfoundry.io to point to 100.27.19.63 (here ns-agnos.ziti.netfoundry.io is entirely arbitrary; it could be another, completely independent domain, you control, like my-agnos.com).
We create the following records in the DNS zone of ziti.netfoundry.io
agnos-ns.ziti.netfoundry.io A 100.27.19.63
_acme-challenge.ziti.netfoundry.io NS agnos-ns.ziti.netfoundry.io
Run Agnos to Obtain the Wildcard cert
Here is the actual Agnos config.toml file I will use in this example:
dns_listen_adr = "0.0.0.0:53"
[[accounts]]
email= "openziti@netfoundry.io"
private_key_path = "/home/admin/priv_key.pem"
[[accounts.certificates]]
domains =  ["*.ziti.netfoundry.io"]
fullchain_output_file = "/home/admin/fullchain.pem"
key_output_file = "/home/admin/cert_key.pem"
Here is how to run Agnos in this example:
./agnos_amd64 --no-staging config.toml
Agnos Visualized
Below is a looping/animated GIF showing what it looks like when executed, as well as some (non-essential, illustrative) decoding of the acquired cert just to prove it contains what we need.
BrowZer Gateway Deployment & Configuration
Customers of our CloudZiti offering will have everything described in this article automatically orchestrated for them.
Meanwhile, if you are a user of our OpenZiti open-source offerings, and you'd like to take BrowZer out for a spin, then you will be interested in reading the next few articles in this series where I describe how to use the certificates you obtained as shown above, and then configure and deploy your own instance of the BrowZer Gateway.
Wrap up
Do you host a web app and want to be invisible to malicious threat actors?
Do you want your users to have easy access from anywhere with no additional software on their client laptop or mobile phone?
Do you want to do all this without making any modifications to your web app?
If so, I hope you'll join our community and try BrowZer.
Please subscribe to this blog to be notified of more information concerning how to succeed.